Open the Layout Editor
Open the Layout Editor
Note: This lesson expects you are using Android Studio 2.3 or higher and you've followed the previous lesson to create your Android project.
To get started, set up your workspace as follows:
- In Android Studio's Project window, open app > res > layout > activity_main.xml.
- To make more room for the Layout Editor, hide the Project window by selecting View > Tool Windows > Project
- If your editor shows the XML source, click the Design tab at the bottom of the window.
- Click Show Blueprint so only the blueprint layout is visible.
- Make sure Show Constraints is on. The tooltip in the toolbar should read Hide Constraints (because they're now showing).
- Make sure Autoconnect is off. The tooltip in the toolbar should read Turn On Autoconnect (because it's now off).
- Click Default Margins in the toolbar and select 16 (you can still adjust the margin for each view later).
- Click Device in Editor in the toolbar and select Pixel XL.
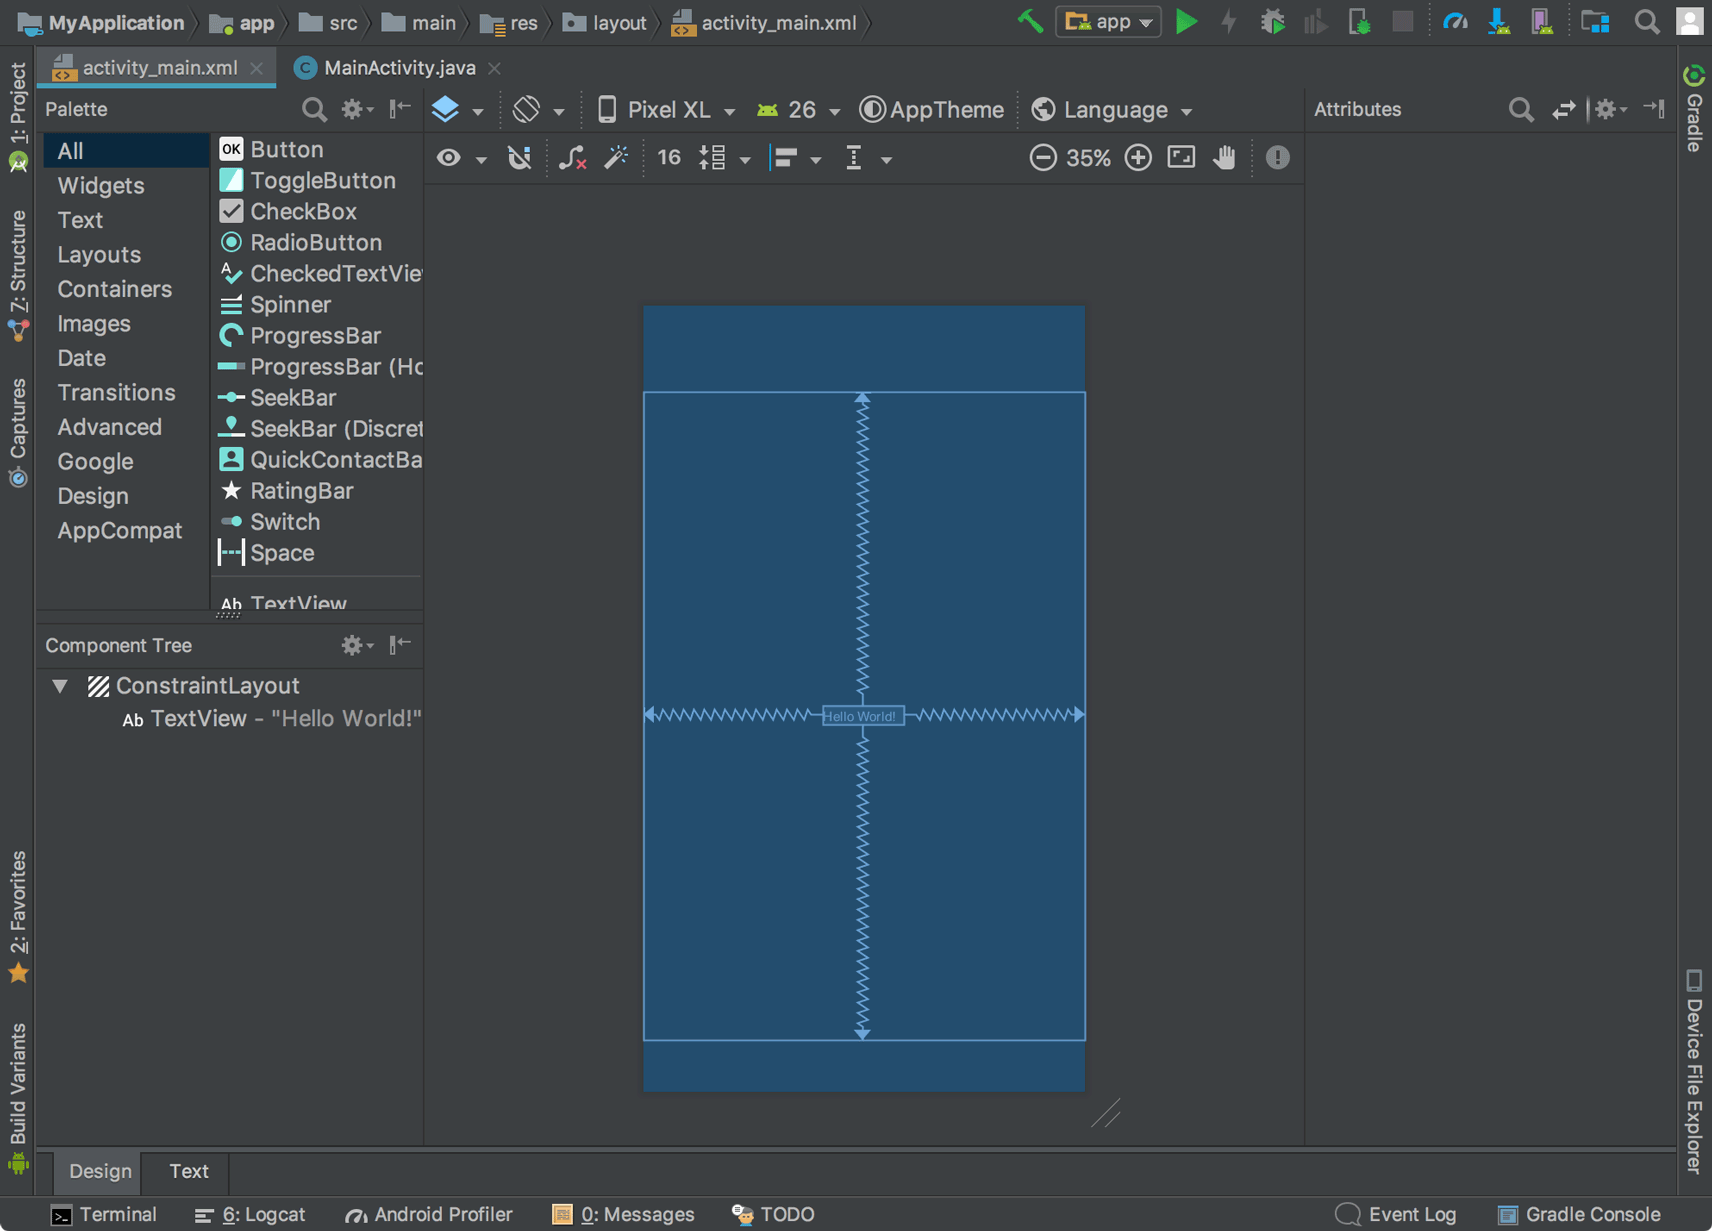
Your editor should now look as shown in figure 3.

Figure 3. The Layout Editor showing
activity_main.xml
The Component Tree window on the bottom-left side shows the layout's hierarchy of views. In this case, the root view is a
ConstraintLayout, containing just one TextView object.ConstraintLayout is a layout that defines the position for each view based on constraints to sibling views and the parent layout. In this way, you can create both simple and complex layouts with a flat view hieararchy. That is, it avoids the need for nested layouts (a layout inside a layout, as shown in figure 2), which can increase the time required to draw the UI.
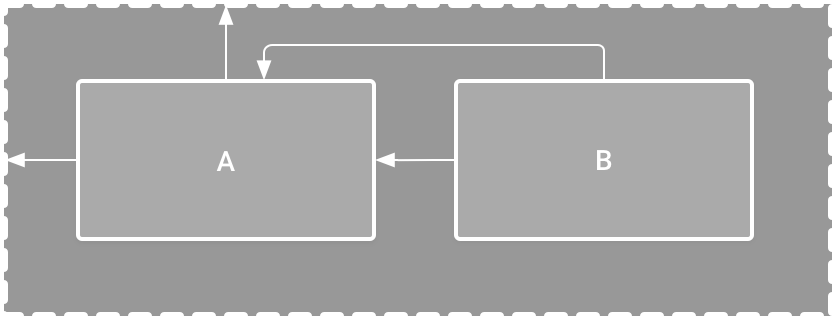
Figure 4. Illustration of two views positioned inside
ConstraintLayout
For example, you can declare the following layout (in figure 4):
- View A appears 16dp from the top of the parent layout.
- View A appears 16dp from the left of the parent layout.
- View B appears 16dp to the right of view A.
- View B is aligned to the top of view A.
In the following sections, you'll build a layout similar to this
Comments
Post a Comment